My wife and I sometimes go to car ‘meet ups’ and take a picnic with us. I had seen online some examples of mini-bars that had been made out of 20l jerry cans and so thought I could make one for us to take that could be used for both food and drink.
I looked online and there were a few designs and a few useful videos but none quite fitted what I wanted to do.
I wanted the following:
- Space for 2 x 750ml bottles (eg Gin & Vermouth etc)
- Space for 2 sizes of Can (Beer/Mixers 330ml & premixed/tonic 150ml)
- Space for 2 large glasses without stems (stems at a picnic = disaster waiting to happen)
- Space for an insulated ice container – ice is a must have
- Space for a mixing glass or shaker
- Space for a jigger
- space for a strainer
- Space for a bar spoon
- A light
- All the contents needs to be securely held so it would not matter which way up the can was stored (car does not have a very big boot)
- No visible bolts or screws through the front or the rear of the jerry can
So I had my criteria and then started to buy the parts I would need (full parts list at the end of this post).
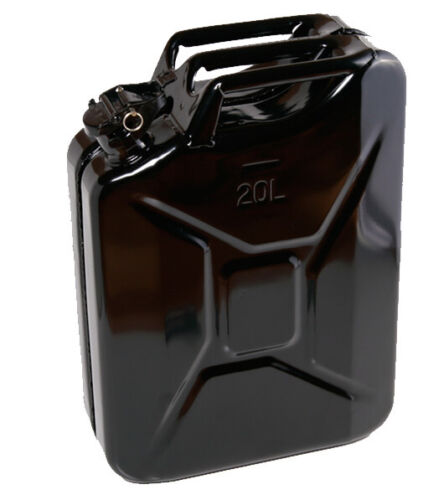
The Petrol or ‘Jerry’ Can
First on the list to purchase was the Jerry Can. This was a new 20L Jerry can bought off of Ebay – this MUST be new for two reasons – 1 – cutting into a fume filled can is dangerous and 2 – well the fumes!!!
I bought a gloss black can as this matches my wife’s car and I knew the enamel paint would be stronger than anything I could use. But as I was not going to paint the outside anything I did had to be neat and must be able to be covered – no pressure then.
The external fixtures and fittings
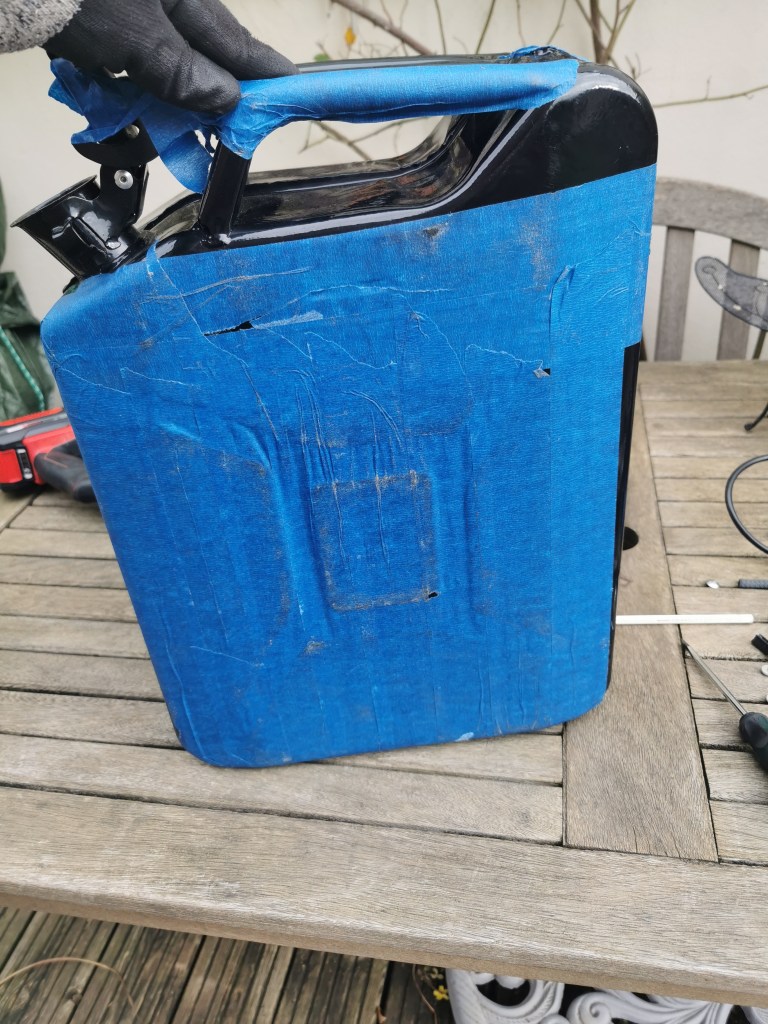
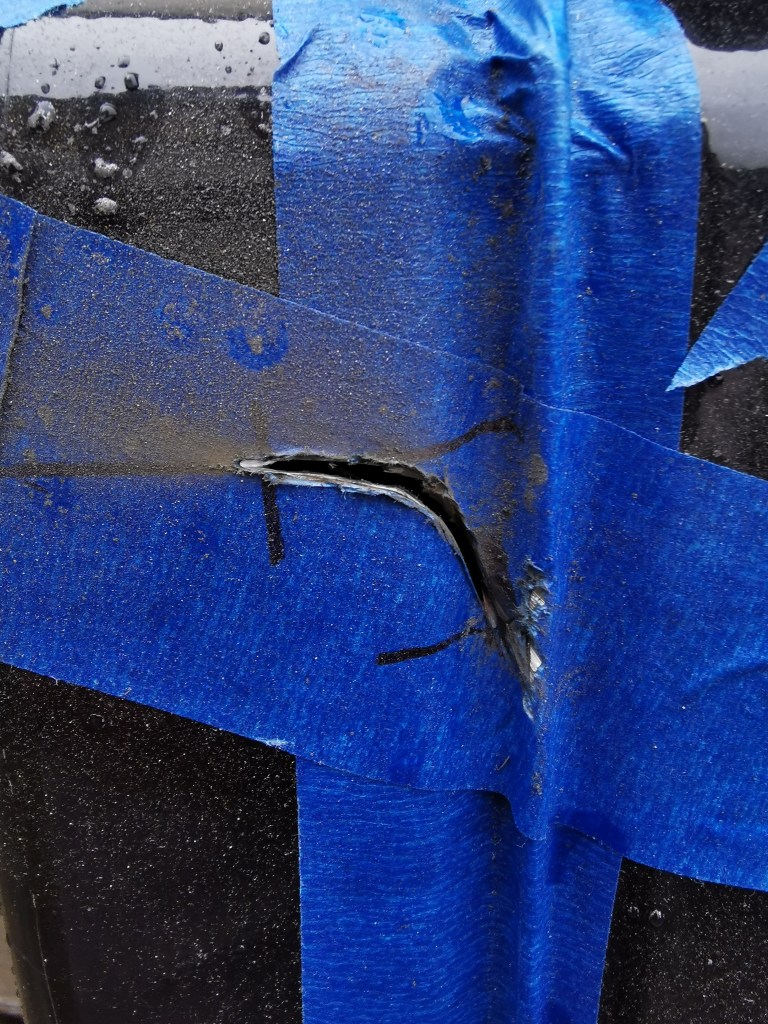
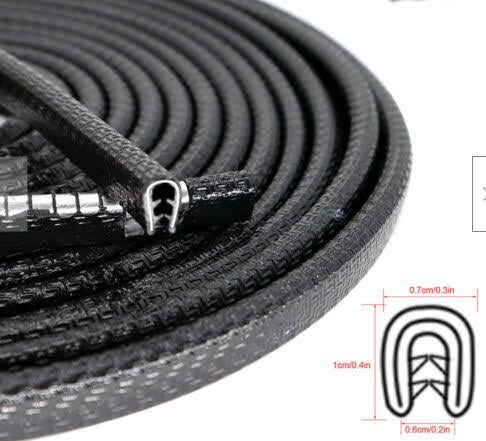
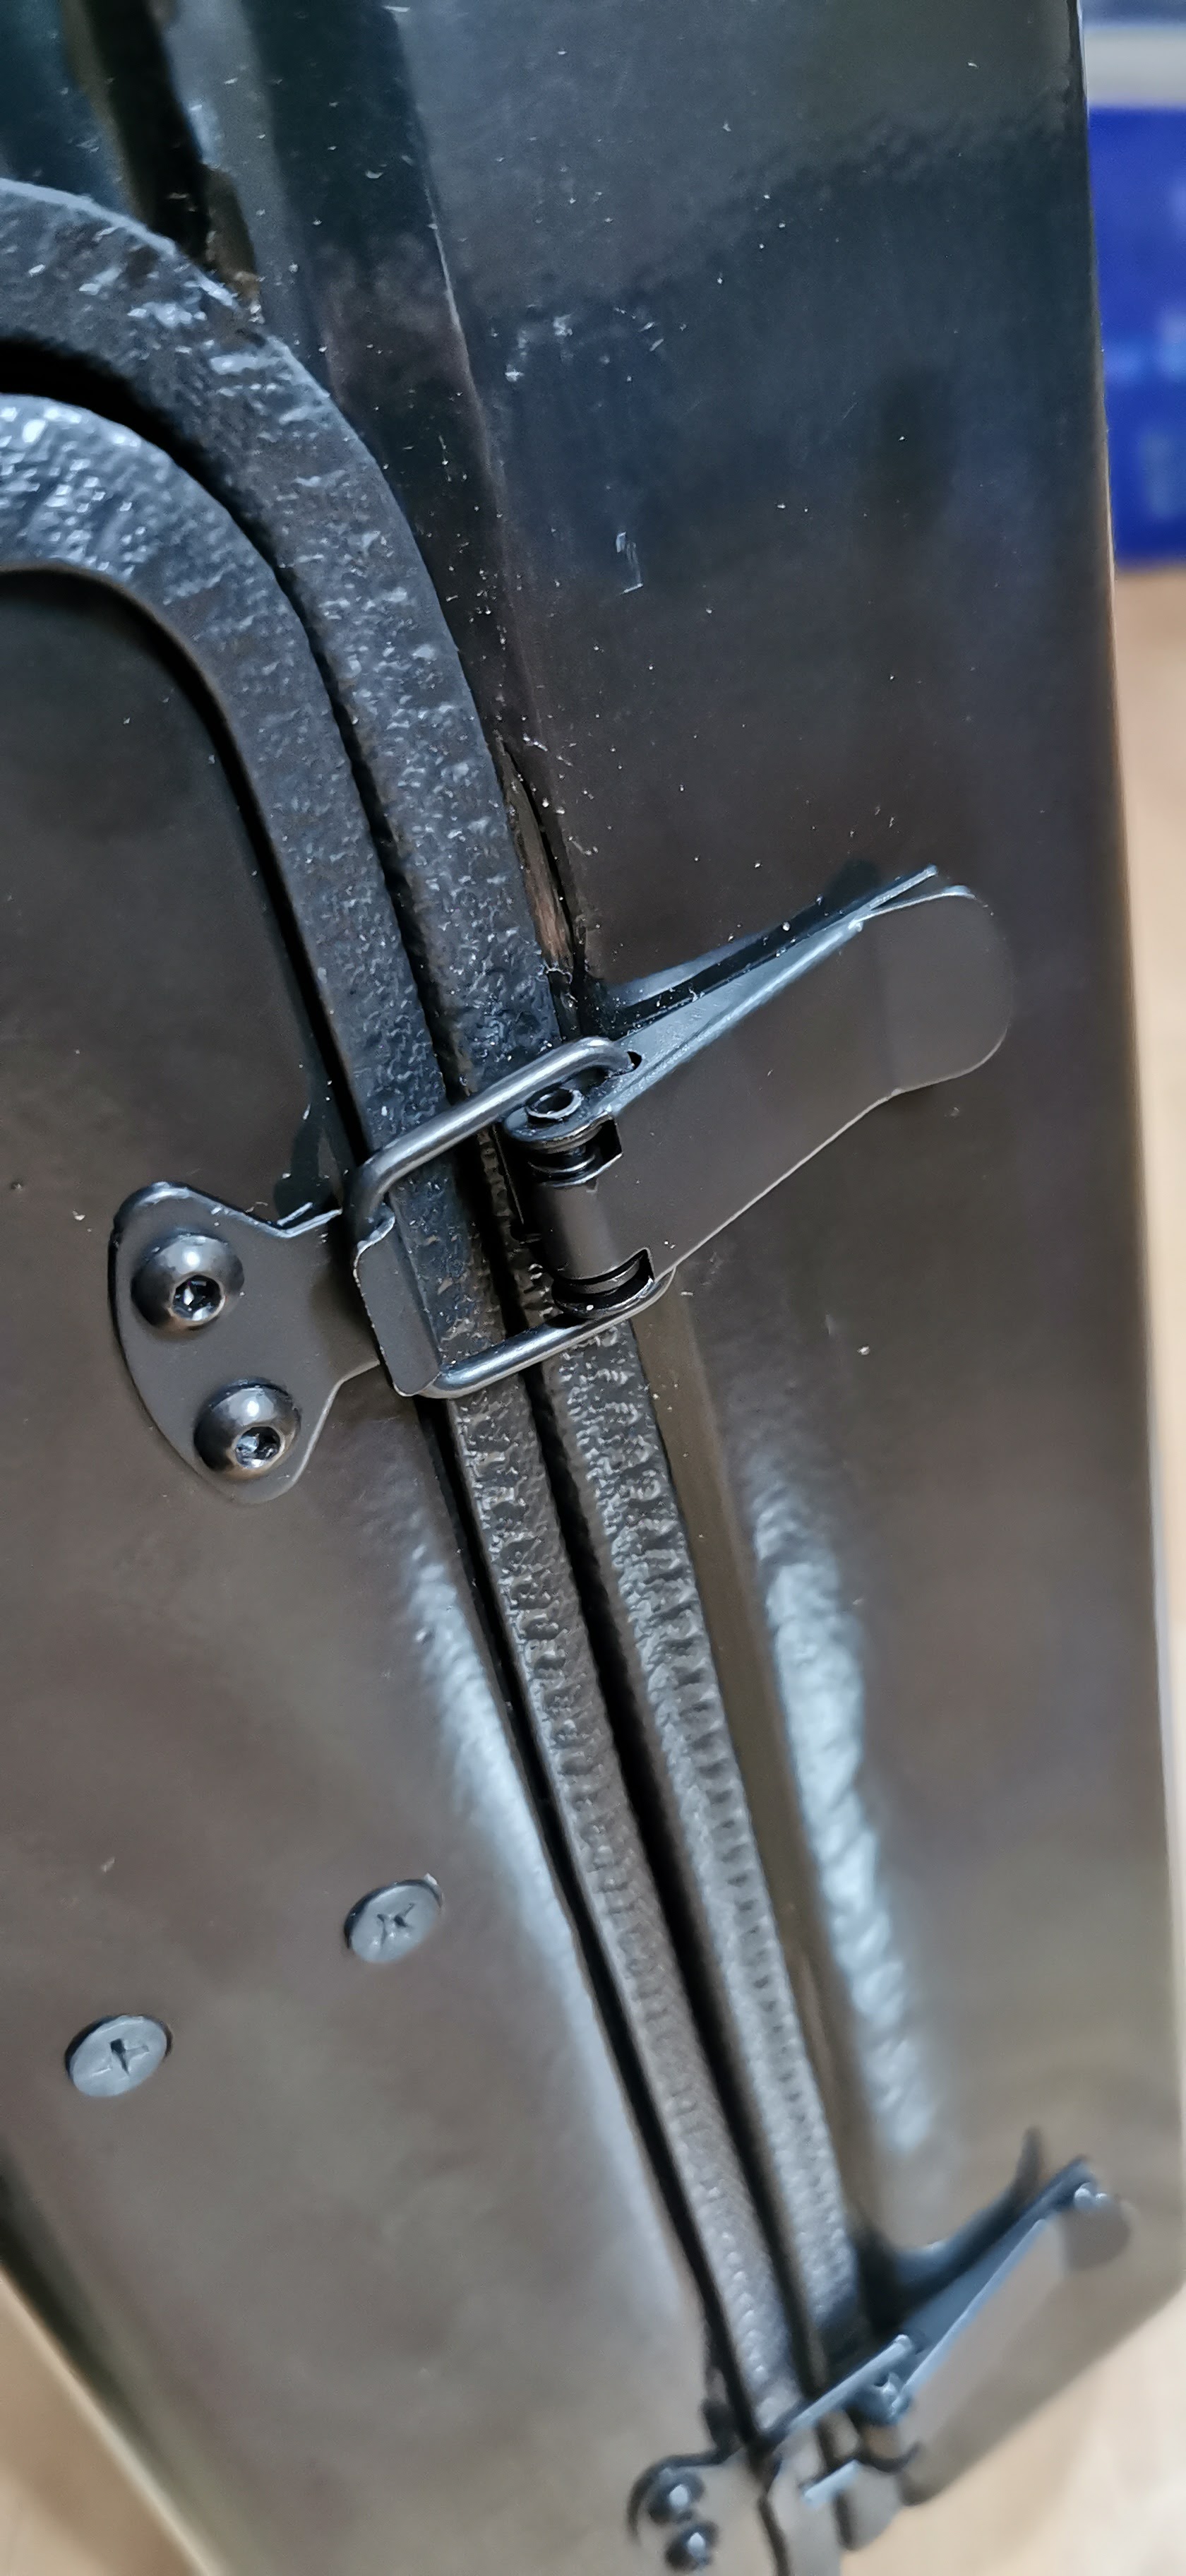
The next thing on my list was the projective edge strip to both stop injury from the sharp edges after cutting the can open and to cover up any damage caused when I cut open the can
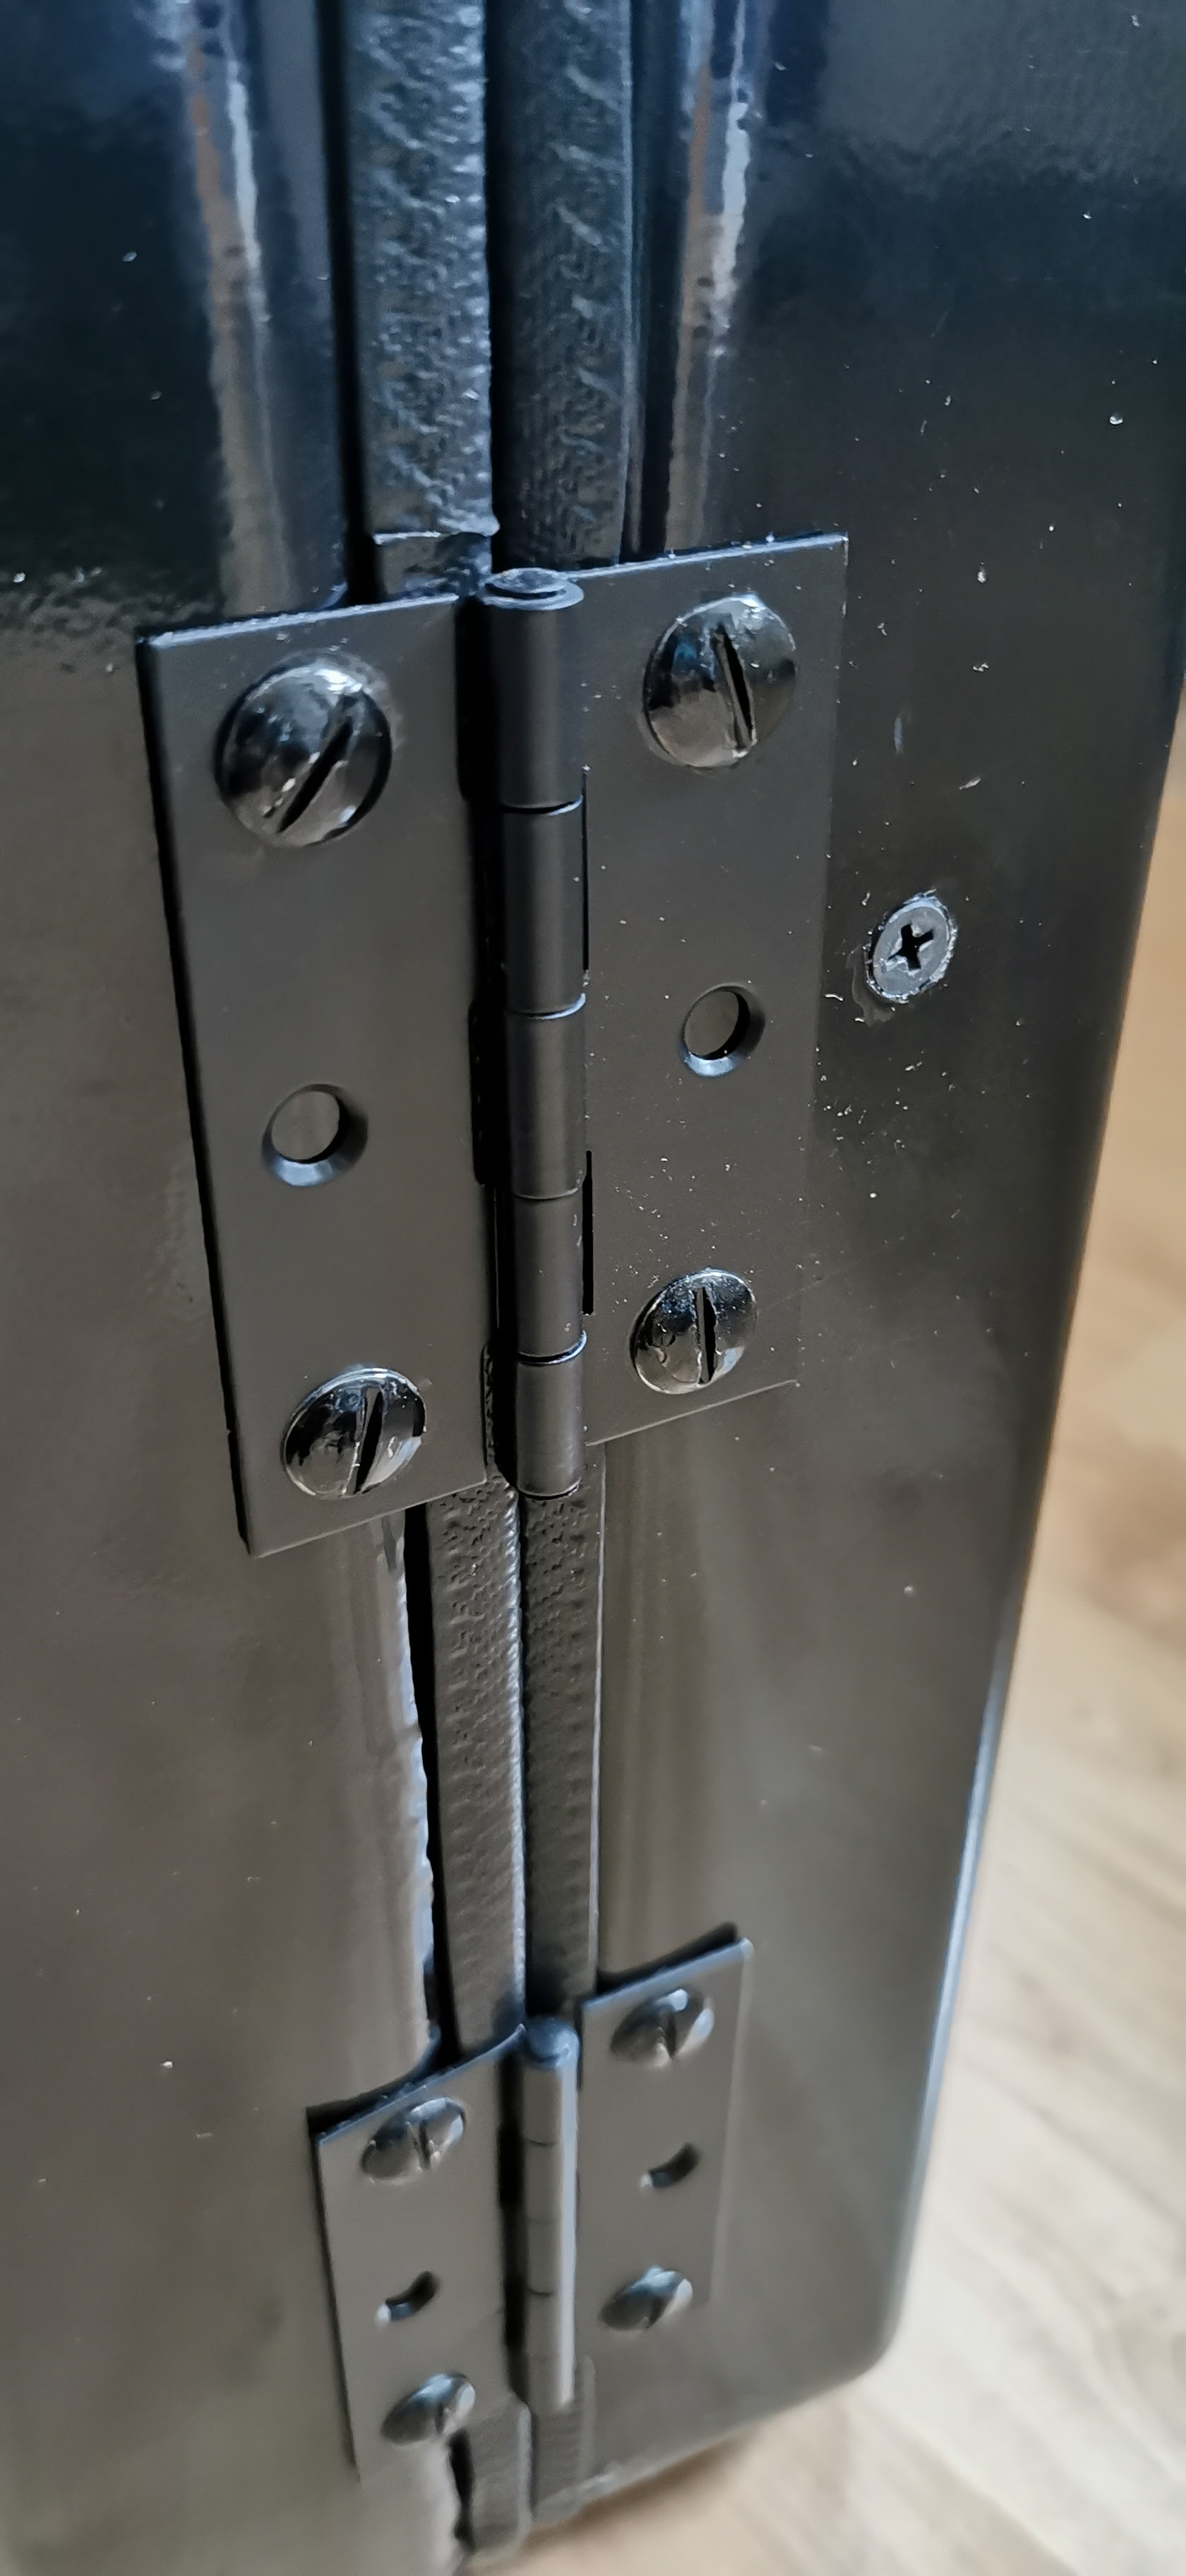
The hinges were just bought from a DIY store but were black – nothing special just butt hinges. I then got hold of some spring clasps to keep the two halves securely closed, these were also in black. I had suitable bolts for the hinges but getting the bolts for the fixings was a bit harder as I wanted black ones that were the right length and size with black washers, but I found what I needed on eBay in the form of machine screws.
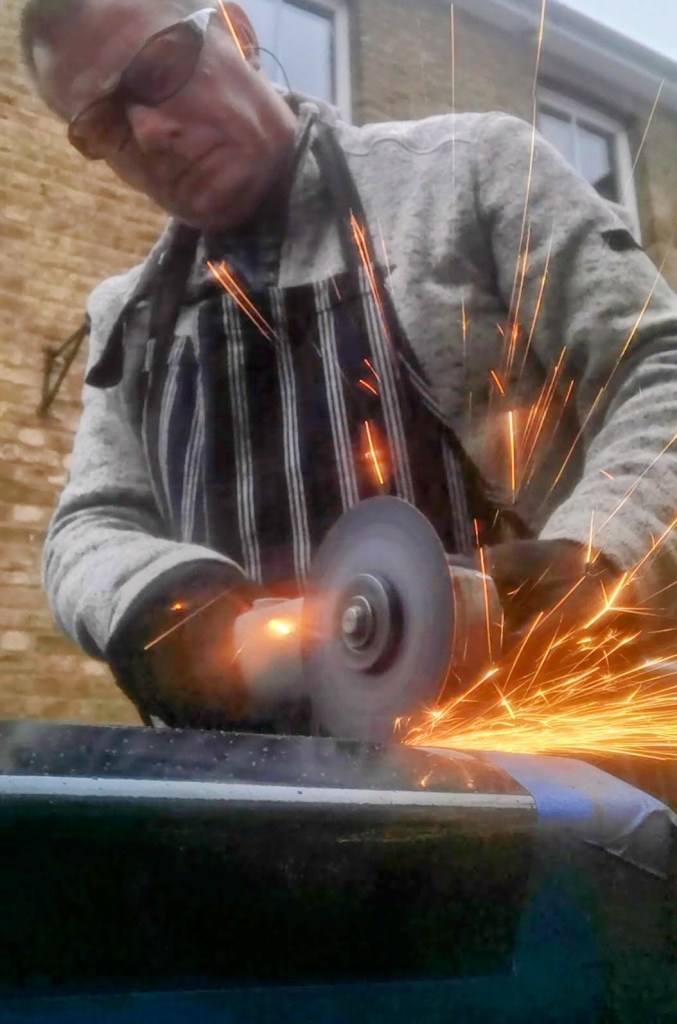
Time to get cutting
I could have opted to simply cut a hole in one side of the can, but this would have limited the space inside. So I opted to cut down the main seam using a cutting disk on my angle grinder, I also tried a small hobby cutter but that did not have the power. Gloves, safety goggles, apron and ear plugs were all employed as this created plenty of theatrical sparks. Cutting the curve was harder but was made with lots of little cuts. Although I knew the protective edge would hide some errors, I did not have much room for error.
Fitting the ‘outside Bits’
Next was to fit the protective strip, the hinges and the catches. This was fairly straight forward with only a little extra metal to remove so it closed perfectly with the extra bulk of the protective strip. I had some aluminium short bolts that fitteet the hinges perfectly and painted the heads black at the end.
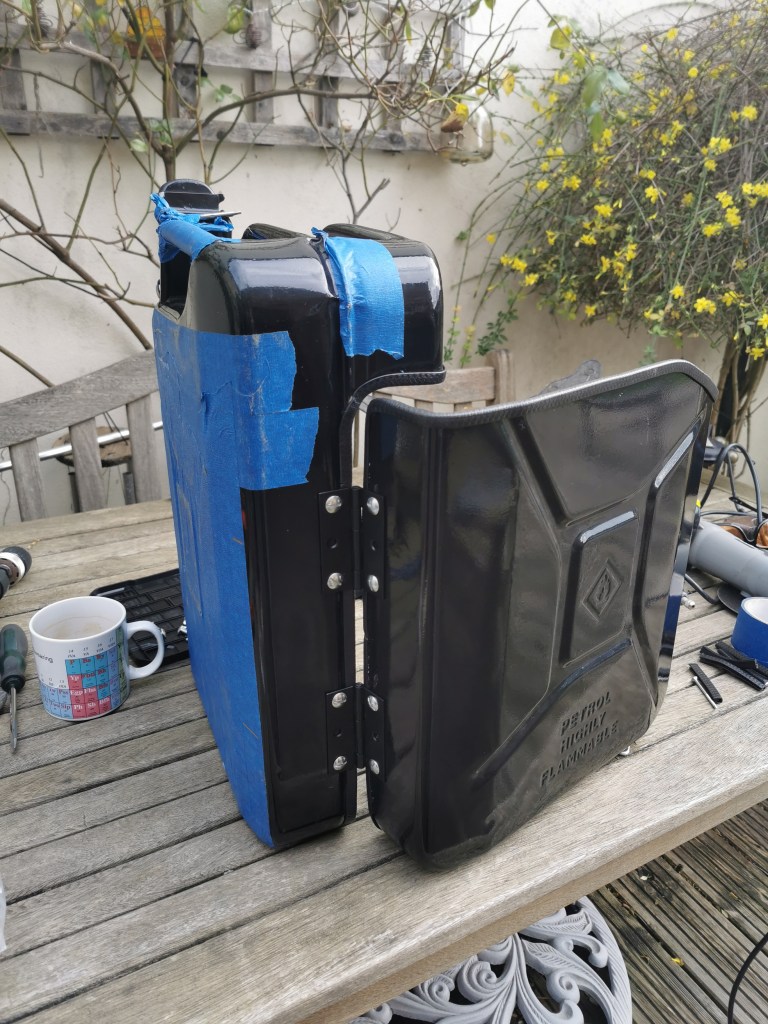
The clasps to hold the two halves together needed me to buy some new small bolts in black and these looked pretty good.
Now for the inside
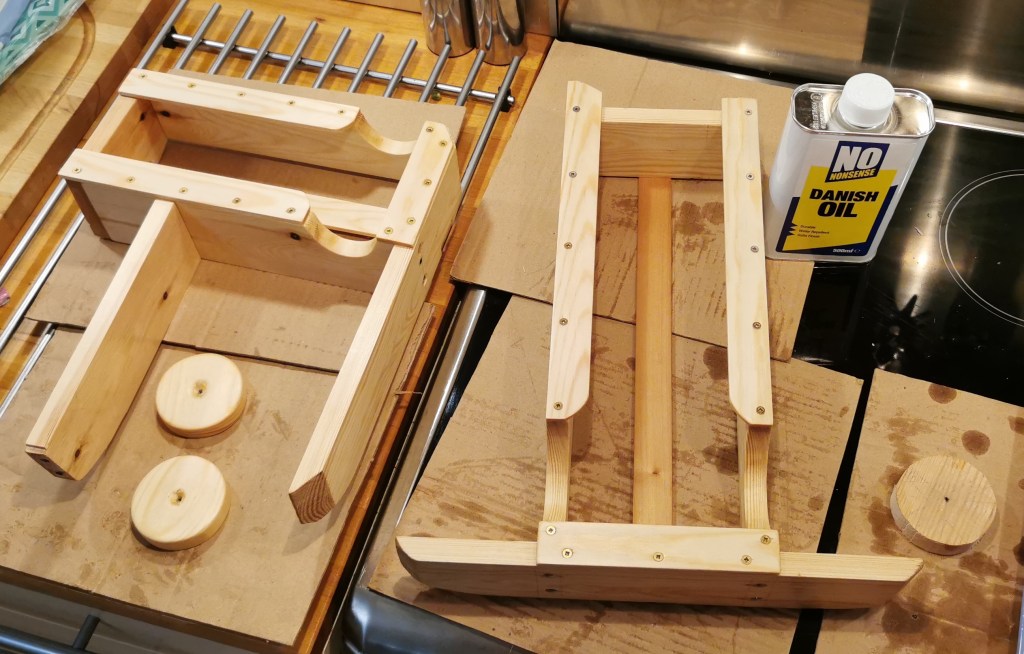
I knew I wanted to paint the inside but knew I had many hours of fiddling with the wooden sections to get them to fit so painting would be the last thing.
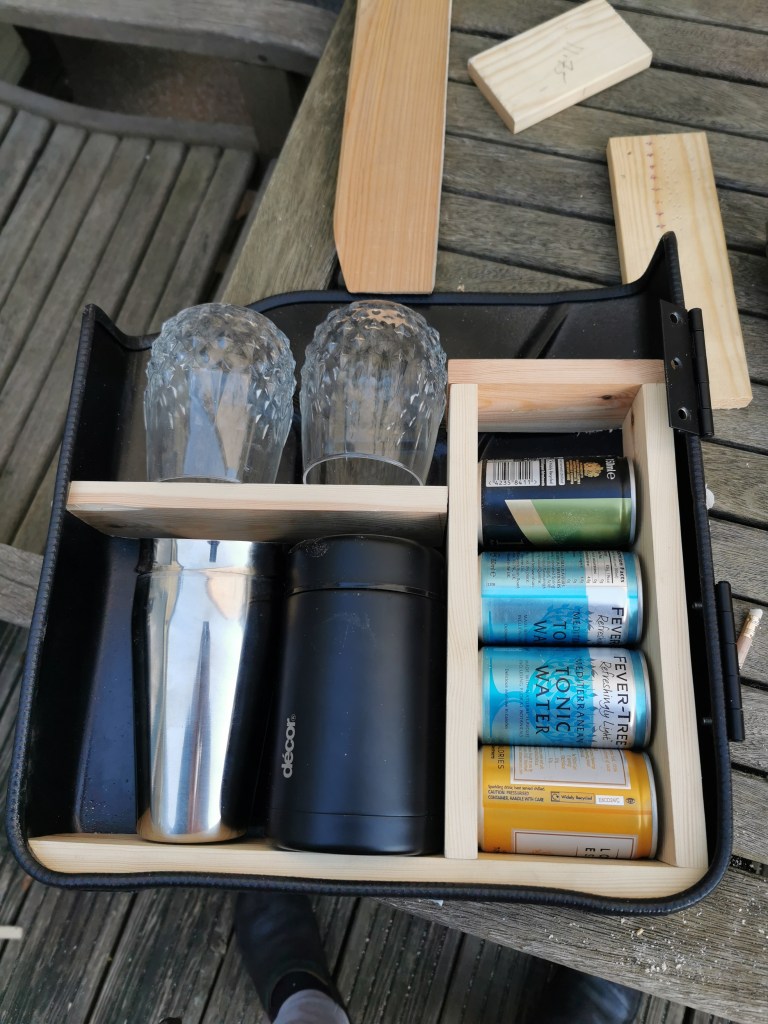
I used pine board to make the inside frame taking dimensions from the glasses and bottles that I was likely to use. It was fiddly but finally I had what I wanted with only a couple of screws visible from top and bottom and sides – I did not want any screws visible from front or rear.
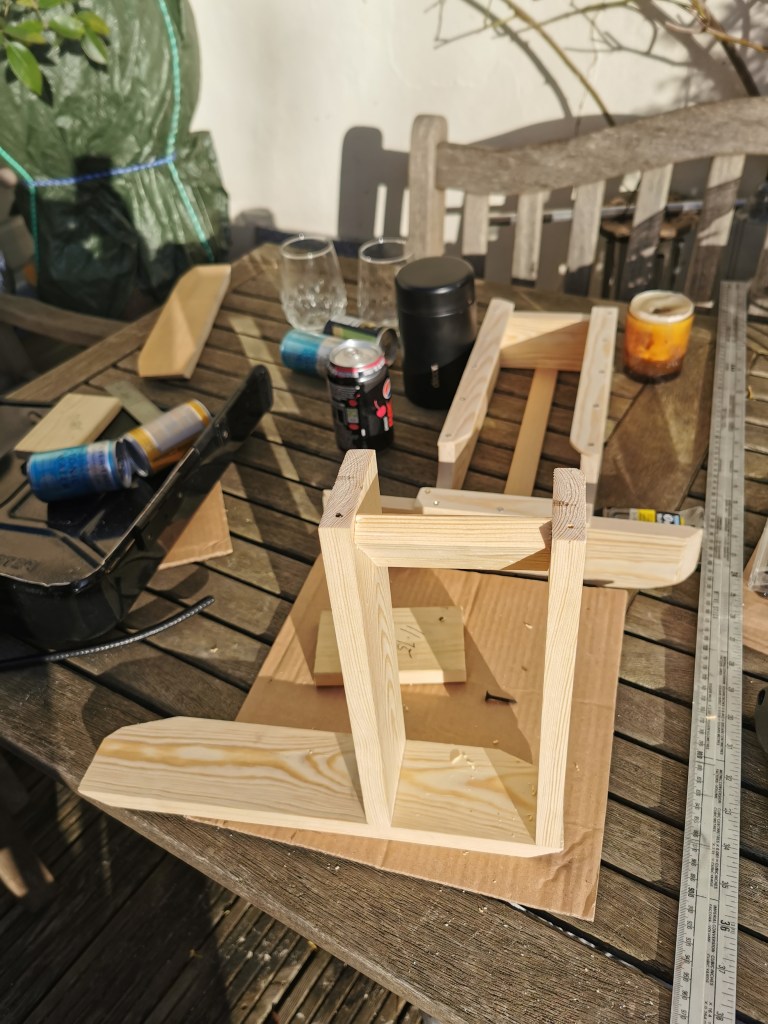
I then took it all apart so I could make rough templates (in case I ever wanted to do this again). And I cut out some circles of wood to keep the glasses I had selected in place without movement.

Finally you will see between this image and the final image that some additional pieces of wood had to be added so that bottles and cans did not clash when the can was closed and clipped shut.
Painting
Having protected the outside of the can, I then needed only to paint the inside. I went for an antique gold spray paint following a white primer coat. This was 2 coats of Primer to 3 coats of gold spray and then finally protected by 2 coats of matt clear lacquer. Worth spending the extra time on the lacquer as I did not fancy redoing all the paint if bottles and cans scraped the inside.
I realised at this point that I would need to add some extra velvet pads to areas that might see more wear.

2 coats of primer and one coat of gold
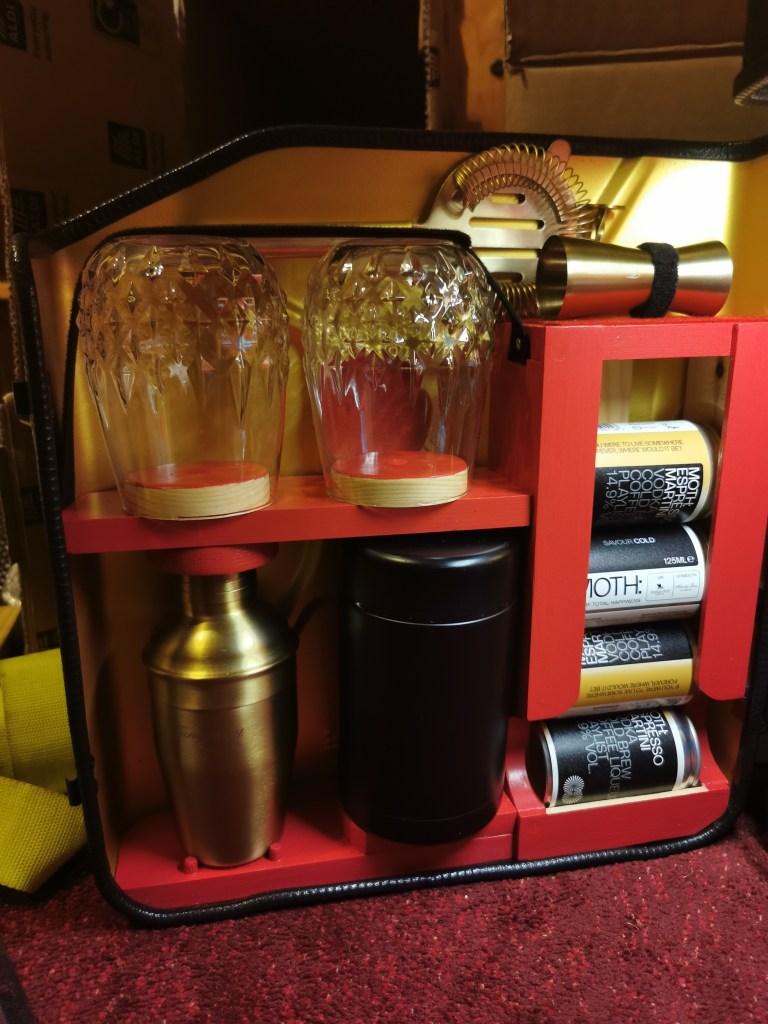
Following a rethink I also decided to paint the wooden inner to match the seats on Maggie’s car. The contrast of red black and old gold has come out quite well. I left some areas of the shelving unpainted as the paint would just get rubbed off with wear in any case near the glasses and the bottom of the can slides.
The finished result
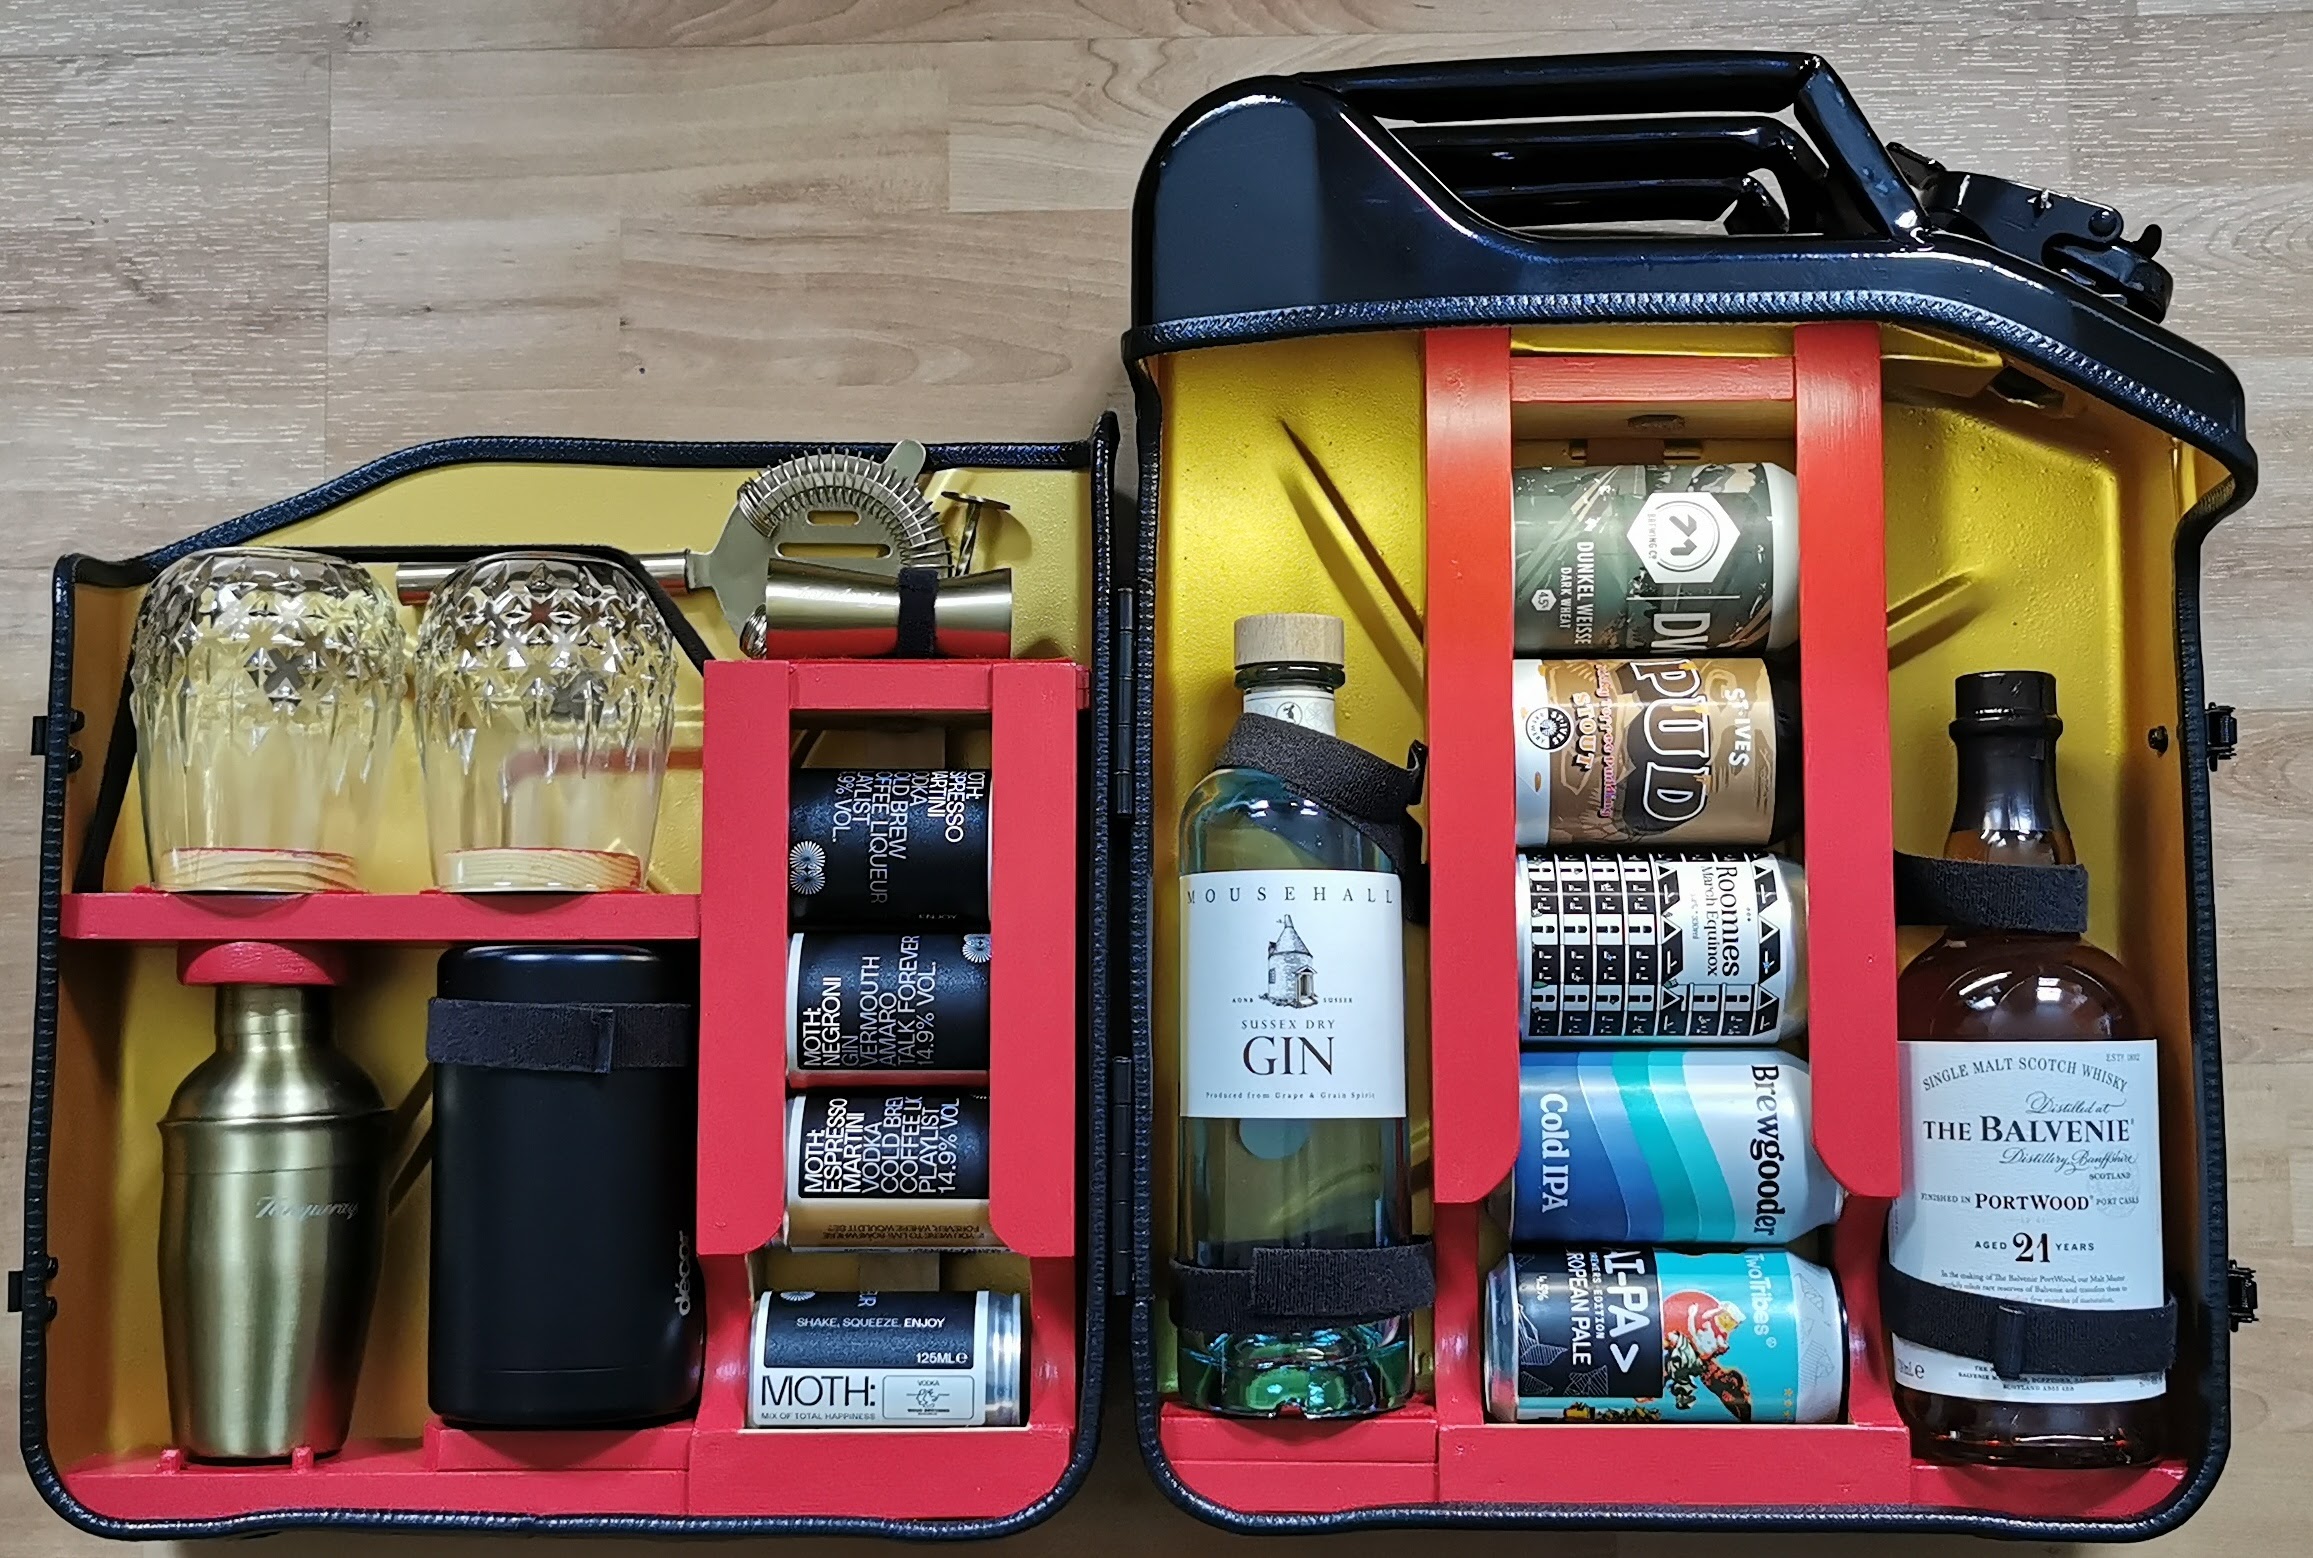
I manged to squeeze in all that I wanted with a pair of glasses and space for a shaker, jigger, bar spoon, strainer, insulated container for ice, 2 full sized bottles of spirits, 4 smaller cans of mixers/RTD cocktails and 5 standard stubby cans of beer/soft drink. I should add that fully loaded it is very heavy – it is likely only to hold a couple of cans and a single bottle of spirits and the ace holder, with the rest of the space taken up with picnic food when it is used in anger.
Some final touches were added using red felt to stop rattling and Velcro straps to keep everything in it’s place. I also added a small light which was fitted inside near the handle and a dab of black gloss paint for the bolt heads and screws.
Job done!
On the whole I am pleased with the end result and some useful lessons were learnt – If ever I felt like making another.
Parts list
The following is a list of parts that I used if it is of any interest to anyone wanting to do something similar.
- A length of pine board 18mm thick by 144mm wide to make the shelves and screws to hold it all together
- Some thin pine slats for the front of the can slides
- A couple of old very thin wooden venetian blind slats to use at the back of the can holders to keep the cans away from scratching the paint at the back of the can rails
- Some double sided Velcro strap to hold bottles, glasses and ice holder safe
- A can each of antique gold, white primer and matt clear lacquer paint
- A square of red sticky backed red velvet (to protect glasses and paint)
- some rubber protection pads for the bottom of the outside of the can to protect where it is stored when upright
- A stick on battery wardrobe light
- A few dabs of gloss enamel paint to cover screwheads
- Blood, sweat and tears 🙂
